Have you ever been in the middle of a crucial game or intense conversation on Discord, only to be plagued by automatic Discord ducking? This frustrating phenomenon occurs when your audio automatically ducks, or decreases in volume, to accommodate other sounds. It’s like trying to have a serious discussion with someone while a loud construction worker is constantly shouting in the background.
If you’re tired of losing your voice in virtual space due to automatic Discord ducking, this comprehensive guide is here to help. We’ll delve into what causes this issue, how to fix it, and even explore alternative solutions if changing attenuation settings doesn’t cut it.
What is automatic Discord Ducking?
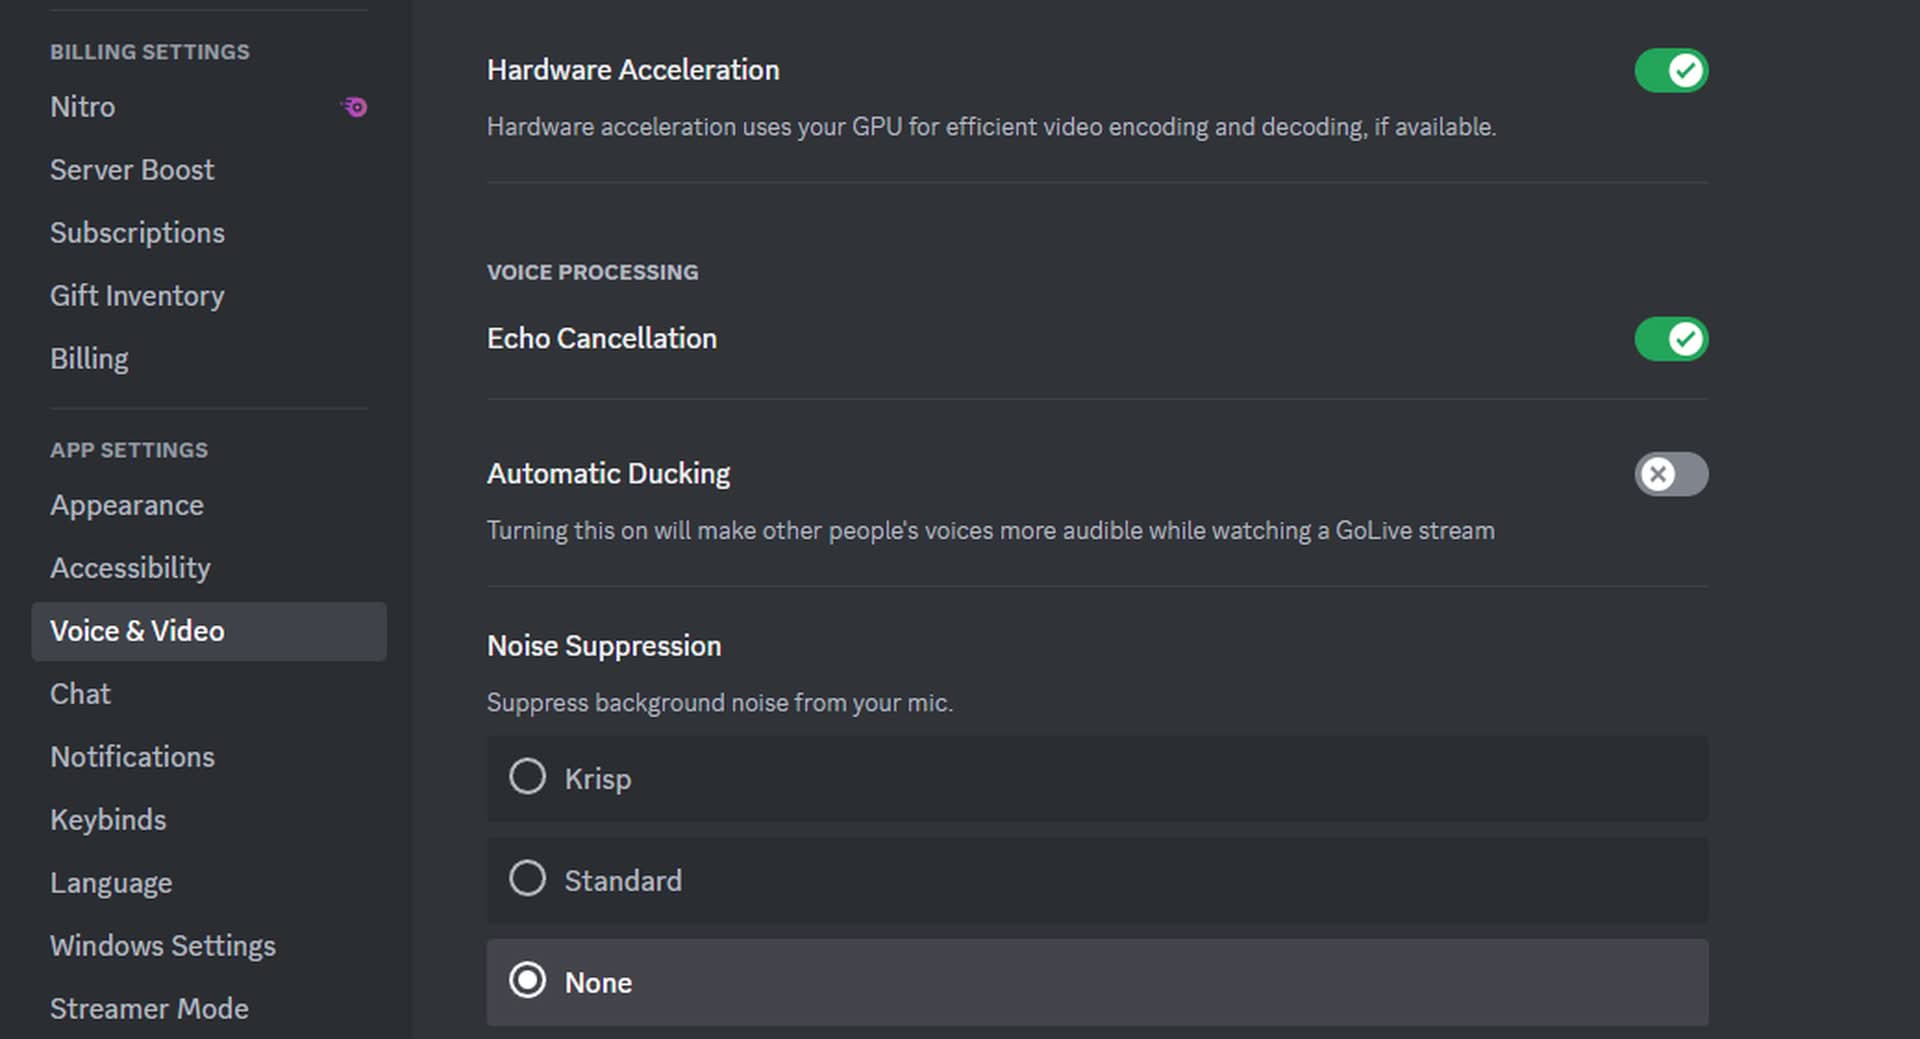
Automatic Discord ducking is a feature designed to enhance audio clarity by reducing the volume of background noise or music when another user starts speaking. While this might sound like a useful tool in theory, it can quickly become irritating and make communication difficult due to its aggressive volume adjustments.
When enabled, automatic Discord ducking monitors your audio input and output levels, lowering the overall volume whenever a new speaker joins the conversation. This is meant to ensure that important voices aren’t drowned out by other sounds, but unfortunately, it often results in an unbalanced audio experience.
How to fix automatic Discord ducking
Fortunately, there are several ways to stop automatic Discord ducking and regain control over your virtual audio environment:
1. Disable automatic ducking
First and foremost, you can simply disable this feature altogether. To do so, navigate to the User Settings > Voice & Video > Input Device > Advanced, where you’ll find an option to toggle “Auto Ducking” off.

2. Adjust attenuation settings
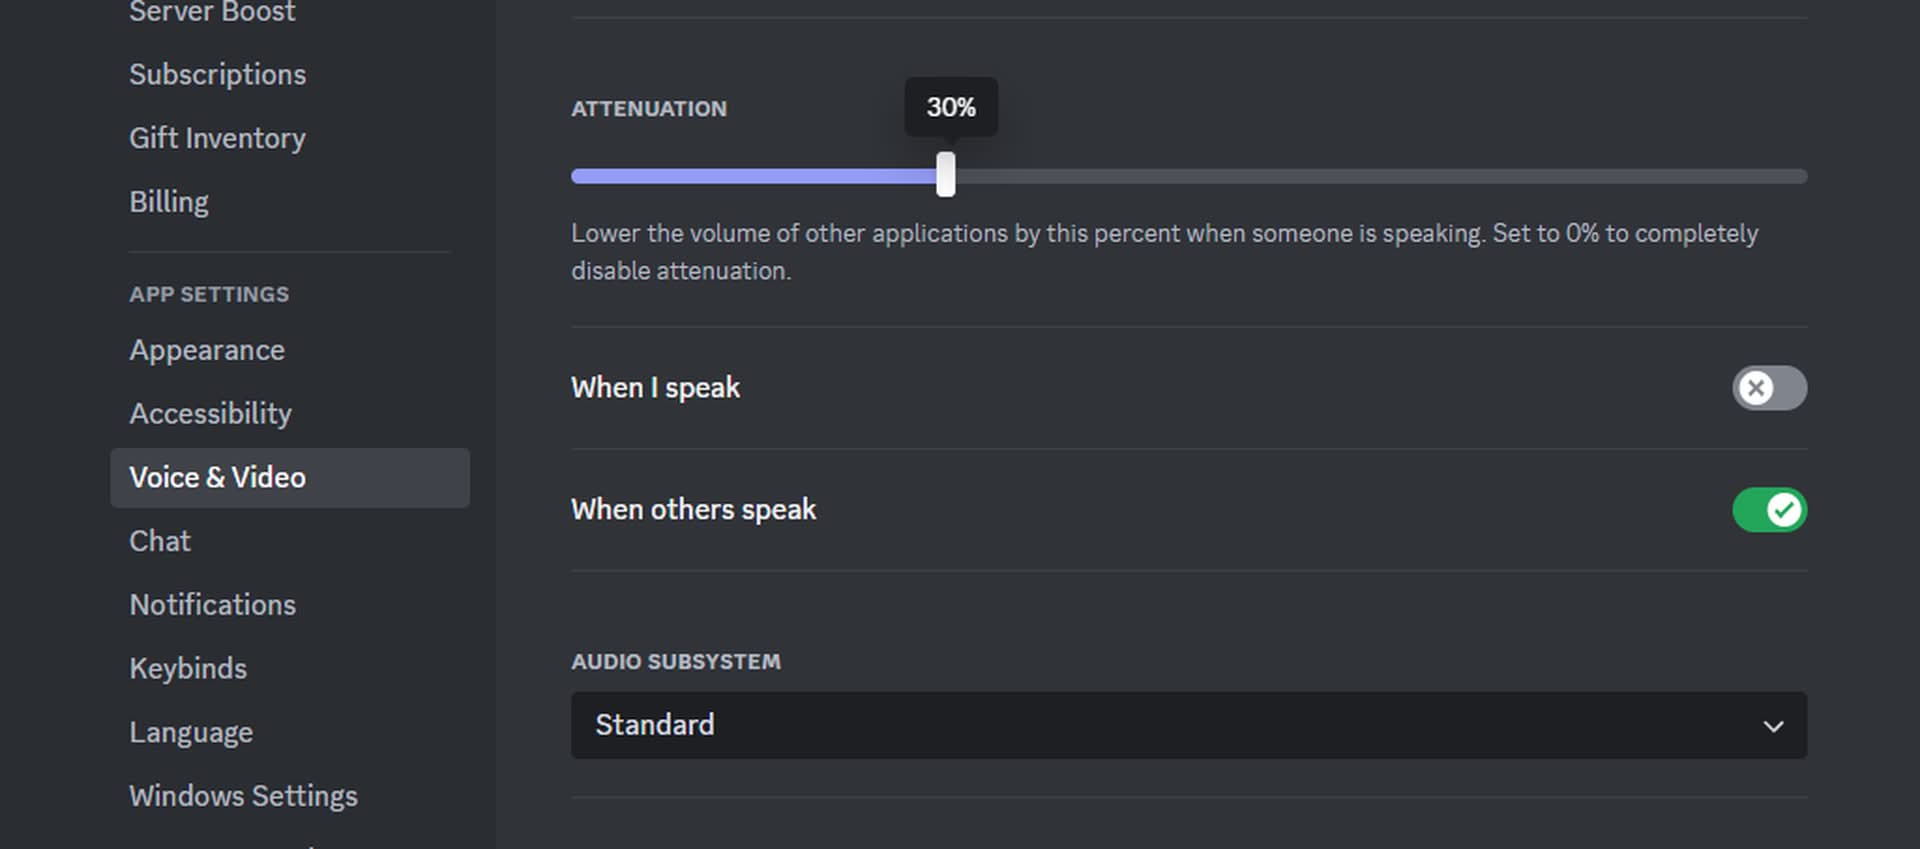
If turning off automatic ducking isn’t feasible or desirable, you can try tweaking the attenuation settings instead. This involves adjusting the volume decrease amount when a new speaker joins the conversation.
To access these settings, head to User Settings > Voice & Video > Input Device > Advanced and adjust the “Attenuation (dB)” slider.

3. Use a different audio output
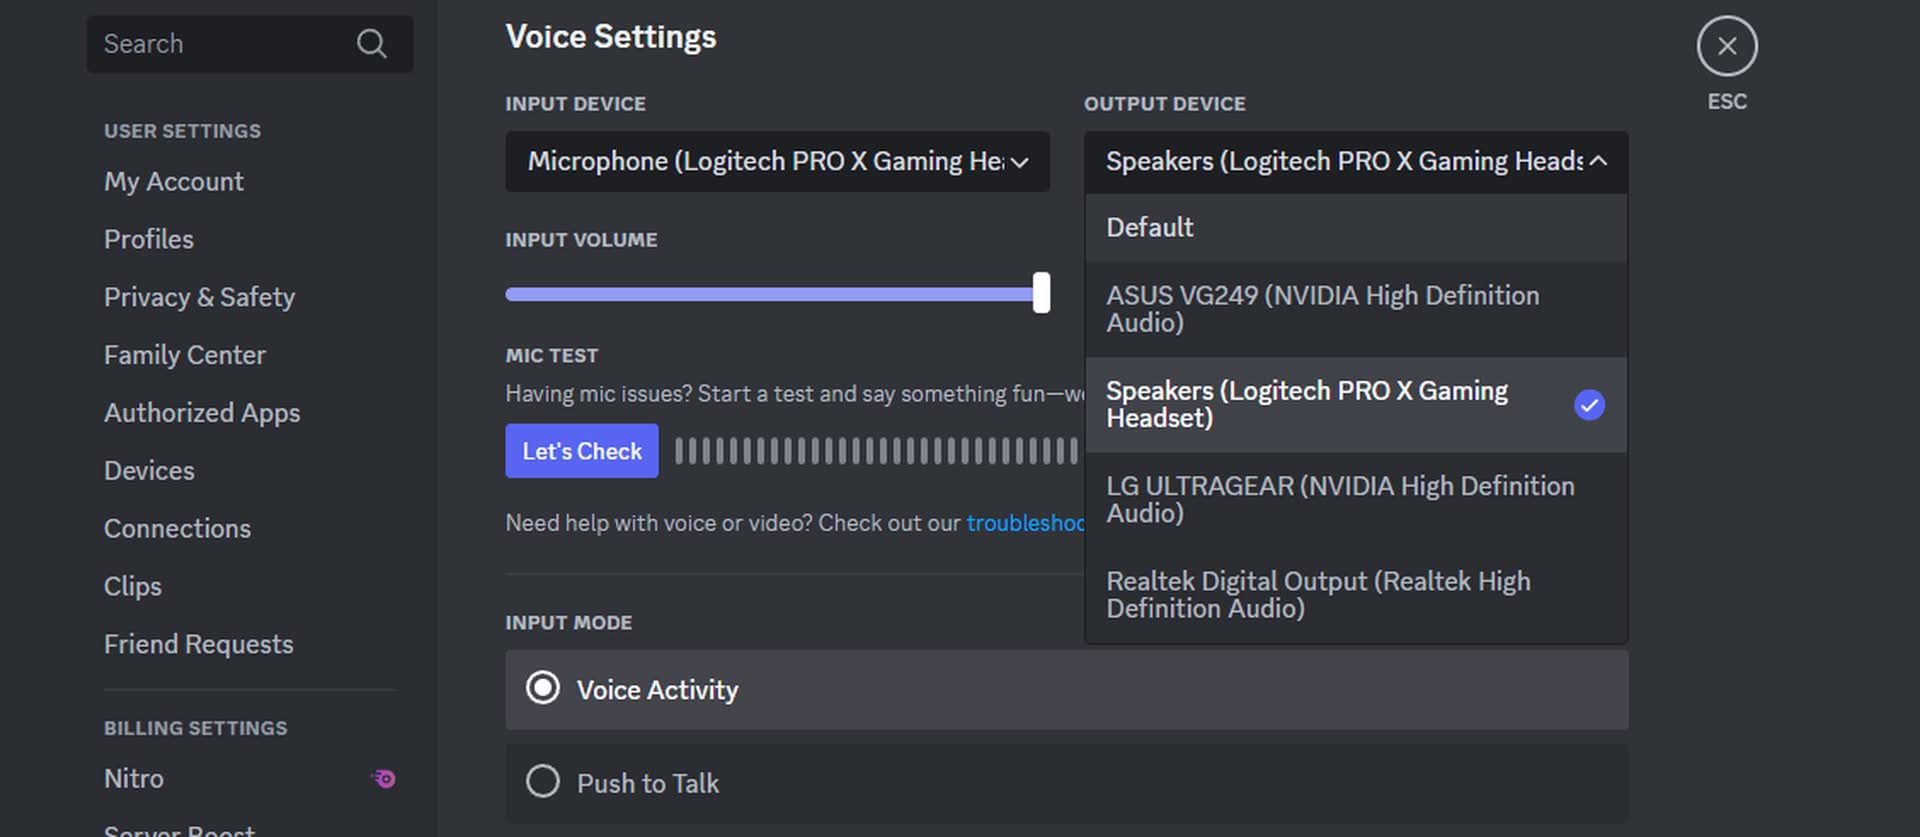
Sometimes, changing your audio output device can help alleviate ducking issues. Try switching from your default audio device to another available option, such as headphones or external speakers, by going to User Settings > Voice & Video > Output Device and selecting an alternative.

What if changing the attenuation does not work?
If adjusting attenuation settings doesn’t resolve the issue, don’t worry – we’ve got more tricks up our sleeve:
Lower input sensitivity: Reducing your input sensitivity can help decrease the volume difference between speakers when automatic ducking is enabled. To do this, navigate to User Settings > Voice & Video > Input Device and lower the “Input Sensitivity” slider.
Use third-party software: Consider using third-party software like Voicemeeter or Virtual Audio Cable, which can help bypass Discord’s default audio processing and provide more control over your audio experience.

What is automatic ducking anyway?
In case you’re unfamiliar with the concept of automatic ducking, it originated in music production as a technique to create dynamic contrast between different tracks. By lowering the volume of background sounds when a prominent element (like a vocal) enters the mix, producers can ensure that important audio elements stand out without being masked by other sounds.
In the context of Discord and other communication platforms, automatic ducking is intended to achieve similar results – allowing users to communicate effectively without being drowned out by background noise or music. However, as we’ve seen, it often leads to a less-than-ideal audio experience for all parties involved.
Don’t like the new Discord UI? Here is how to revert Discord update
By now, you should have a comprehensive understanding of what automatic Discord ducking is and how to stop it from happening. Whether you choose to disable the feature entirely, adjust attenuation settings, switch output devices, or explore alternative solutions – we hope this guide has equipped you with the knowledge needed to regain control over your virtual audio environment.
Remember: Communication should be clear and easy to understand, without any unnecessary distractions. With these tips in hand, you’ll be well on your way to enjoying a more enjoyable and productive online experience.


