DeepSeek-R1 is dominating tech discussions across Reddit, X, and developer forums, with users calling it the “people’s AI” for its uncanny ability to rival paid models like Google Gemini and OpenAI’s GPT-4o—all while costing nothing.
DeepSeek-R1, a free and open-source reasoning AI, offers a privacy-first alternative to OpenAI’s $200/month o1 model, with comparable performance in coding, math, and logical problem-solving. This guide provides step-by-step instructions for installing DeepSeek-R1 locally and integrating it into projects, potentially saving hundreds of dollars monthly.
Someone stop DeepSeek: Meet Janus-Pro-7B, another free AI model
Why DeepSeek-R1 is trending?
Unlike closed models that lock users into subscriptions and data-sharing agreements, DeepSeek-R1 operates entirely offline when deployed locally. Social media benchmarks show it solving LeetCode problems 12% faster than OpenAI’s o1 model while using just 30% of the system resources. A TikTok demo of it coding a Python-based expense tracker in 90 seconds has racked up 2.7 million views, with comments like “Gemini could never” flooding the thread. Its appeal? No API fees, no usage caps, and no mandatory internet connection.
What is DeepSeek-R1 and how does it compare to OpenAI-o1?
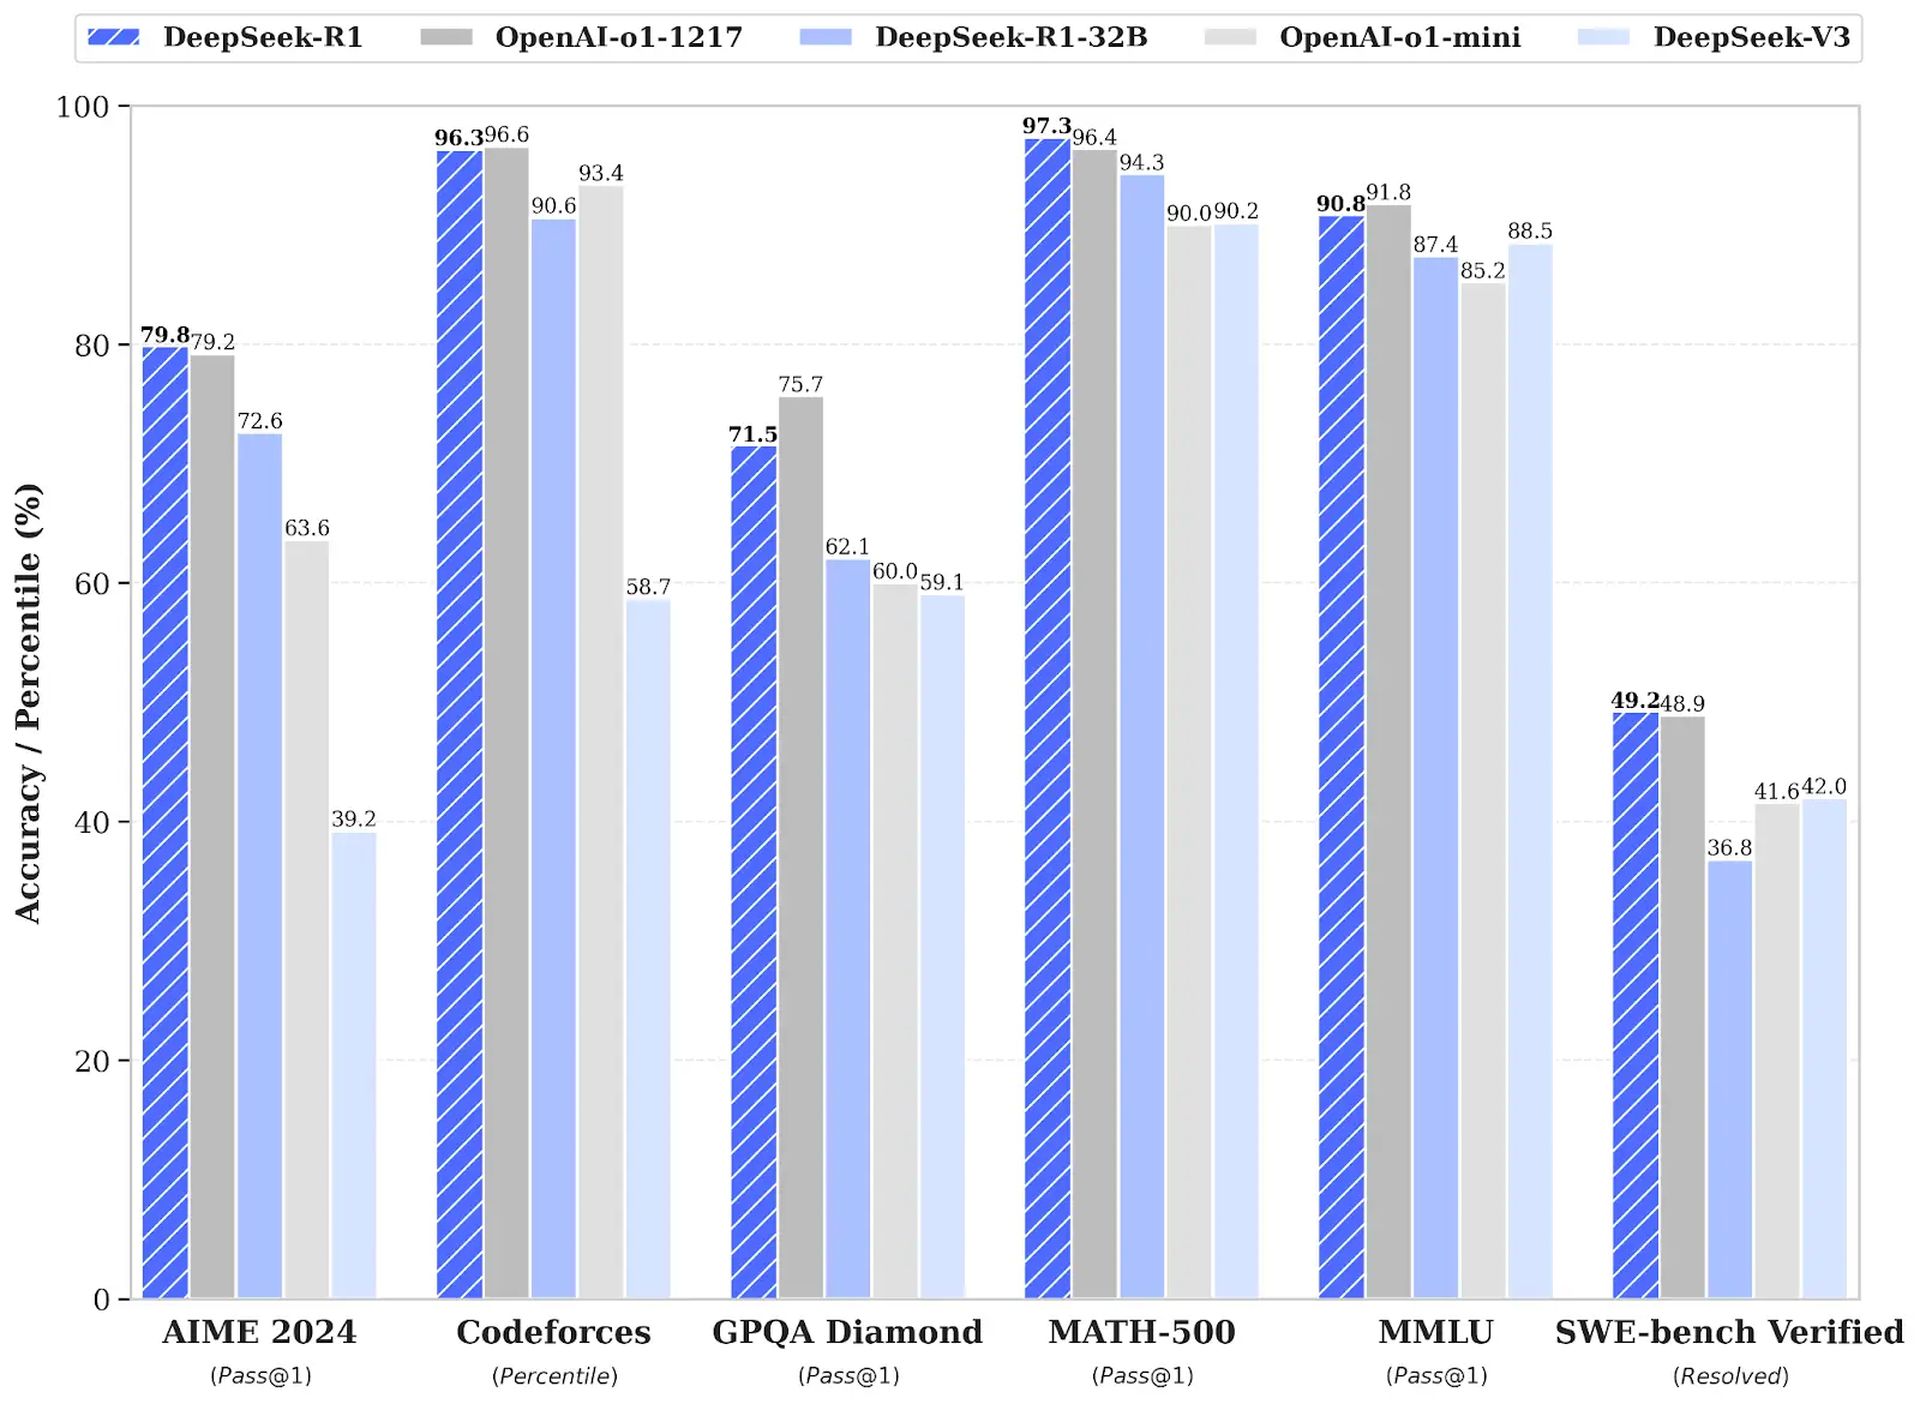
DeepSeek-R1 is a revolutionary reasoning AI that uses reinforcement learning (RL) instead of supervised fine-tuning, achieving a 79.8% pass@1 score on the AIME 2024 math benchmark. It outperforms OpenAI-o1 in cost efficiency, with API costs 96.4% cheaper ($0.55 vs. $15 per million input tokens) and the ability to run locally on consumer hardware. DeepSeek-R1 is open-source, offering six distilled models ranging from 1.5B to 671B parameters for diverse applications.
Step-by-step installation guide for DeepSeek-R1 (local)
To install DeepSeek-R1 locally using Ollama and Open Web UI, follow these steps:
Windows 10 and 11
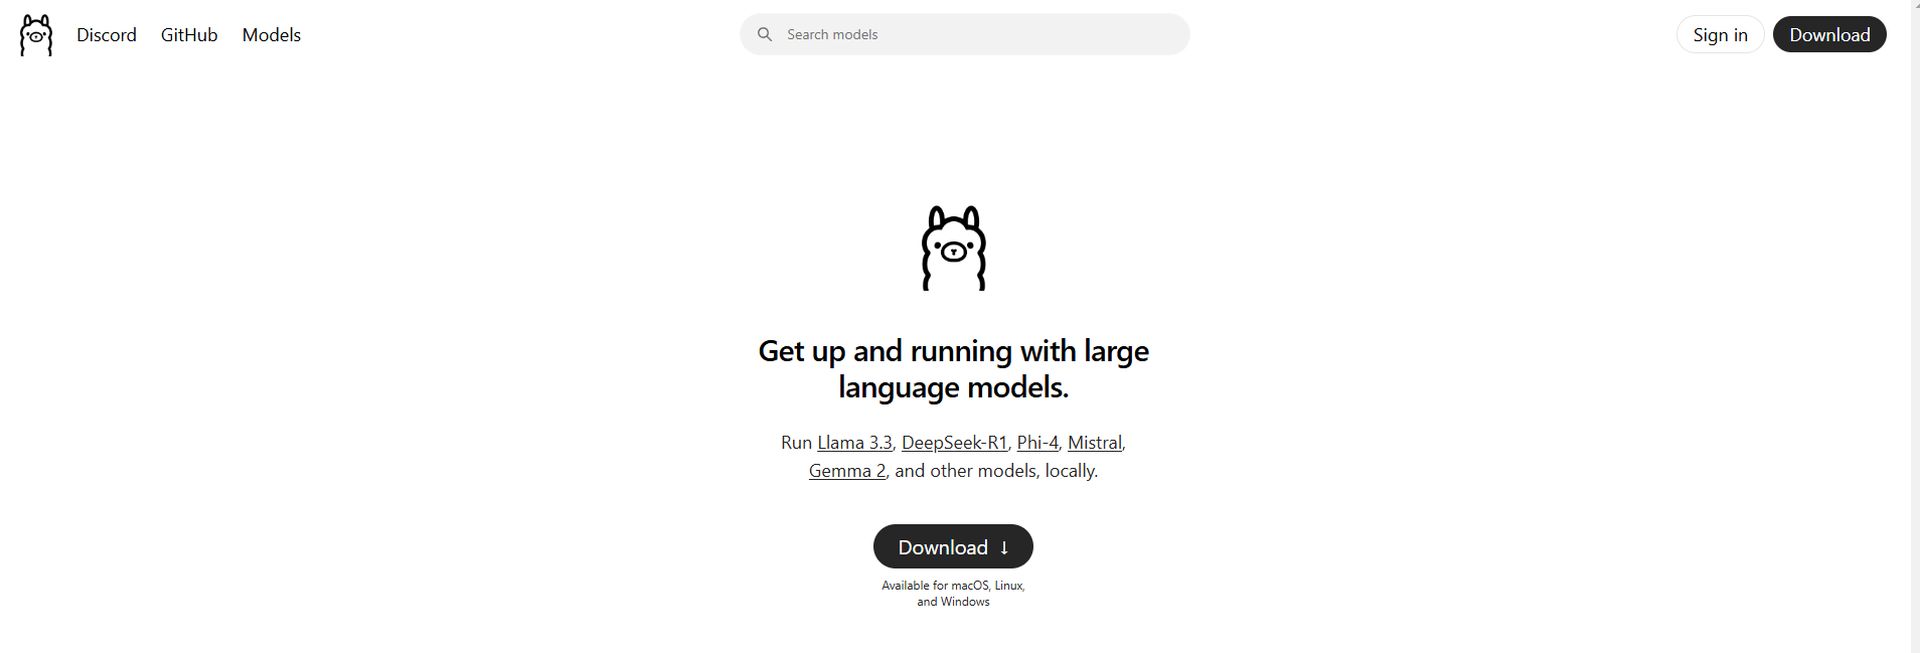
- Visit https://ollama.com.
- Click Download and complete the installation process.
- Right-click Start and open Terminal or PowerShell.
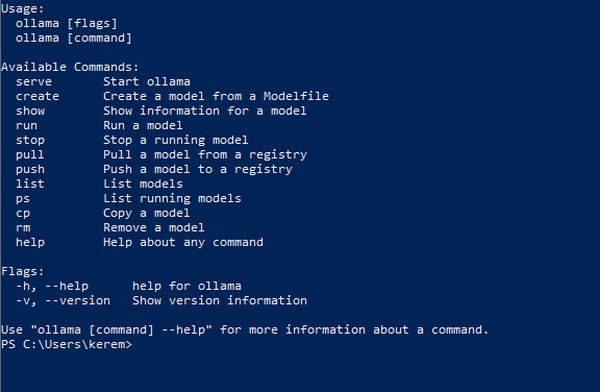
- Type
ollamaand press Enter. - If you see this message, Ollama is installed correctly:
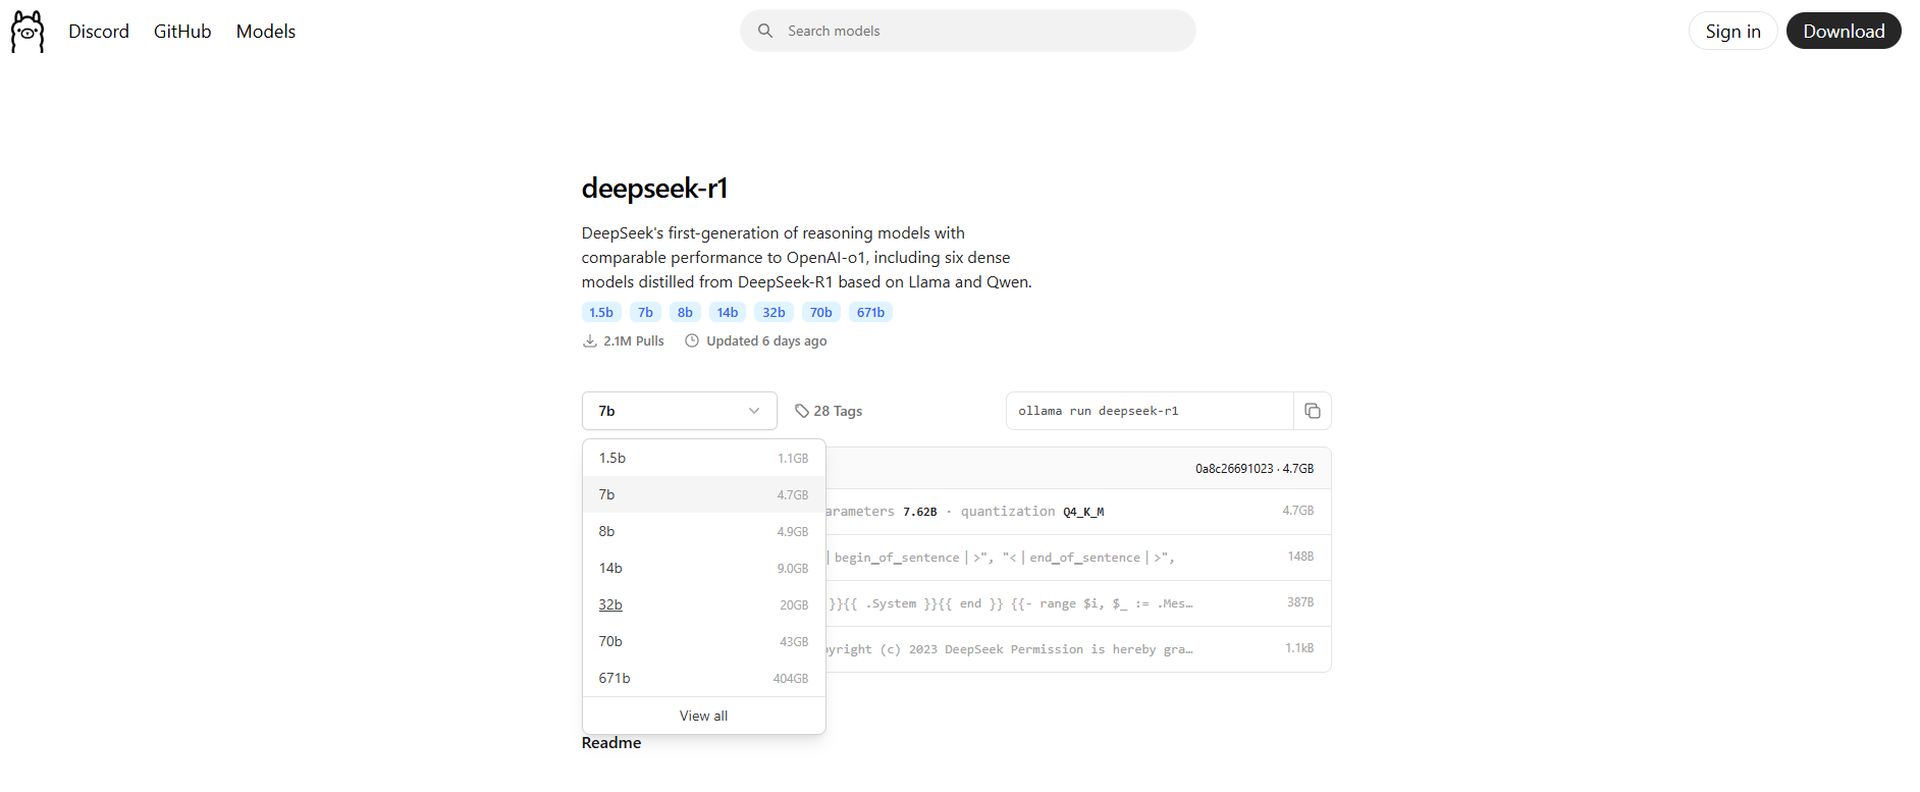
- Go to https://ollama.com/search and select DeepSeek-R1.
- Adjust the parameters to match your hardware.

- Click the Copy button on the right.
- Return to Terminal/PowerShell, paste the command, and press Enter.
- Complete the download process.
- Visit https://chatboxai.app.
- Download and install the application.
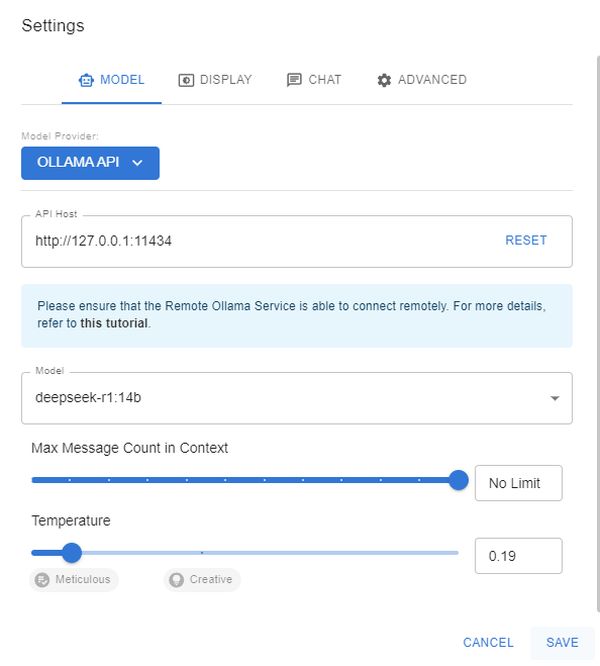
- In the app settings, set the API Host to Ollama and the Model to DeepSeek-R1, as seen in below image:
- Save the settings and start chatting, just like ChatGPT.
macOS and Linux
1. Install Ollama via terminal (macOS/Linux):
curl -fsSL https://ollama.com/install.sh | sh ollama -v #check Ollama version2. Download a DeepSeek-R1 distilled model via Ollama:
# Default 7B model (4.7GB - ideal for consumer GPUs)
ollama run deepseek-r1

# Larger 70B model (requires 24GB+ VRAM)
ollama run deepseek-r1:70b

# Full DeepSeek-R1 (requires 336GB+ VRAM for 4-bit quantization)
ollama run deepseek-r1:671b
3. Set up Open Web UI for a private interface:
docker run -d -p 3000:8080 \
 --add-host=host.docker.internal:host-gateway \
 -v open-webui:/app/backend/data \
 --name open-webui \
 --restart always \
 ghcr.io/open-webui/open-webui:main
Access the interface at http://localhost:3000 and select deepseek-r1:latest. All data remains on your machine, ensuring privacy.
How to integrate DeepSeek-R1 into your projects
DeepSeek-R1 can be integrated locally or via its cloud API:
1. Local deployment (privacy-first):
import openai
Connect to your local Ollama instance
client = openai.Client(
base_url="http://localhost:11434/v1",
api_key="ollama" # Authentication-free private access
)

response = client.chat.completions.create(
model="deepseek-r1:XXb ", # change the "XX" by the distilled model you choose
messages=[{"role": "user", "content": "Explain blockchain security"}],
temperature=0.7 # Controls creativity vs precision
)
2. Using the official DeepSeek-R1 cloud API:
import openai from dotenv import load_dotenv import os
load_dotenv()
client = openai.OpenAI(
base_url="https://api.deepseek.com/v1",
api_key=os.getenv("DEEPSEEK_API_KEY")
)

response = client.chat.completions.create(
model="deepseek-reasoner",
messages=[{"role": "user", "content": "Write web scraping code with error handling"}],
max_tokens=1000 # Limit costs for long responses
)
DeepSeek-R1 provides a cost-effective, privacy-focused alternative to OpenAI-o1, ideal for developers seeking to save money and maintain data security. For further assistance or to share experiences, users are encouraged to engage with the community.
Featured image credit: DeepSeek


